For a short while Unsponsored had a rival on my PC, a small site that centred around providing GPS routes of mountain bike routes. The Mountain Bike mags didn’t like it much and it took a huge amount of effort to keep it going. SO dispite the support it faded away. Anyway this post is the 900th on Unsponsored and provides a little showcase of the type of stuff that was on my other site – Northernroutes.
If your brakes don’t work properly you are going to end up stacked in some ditch or tree. Maintianing your brakes is crucial for your own safety. On hydraulic brakes when you pull the lever the brake fluid is pushed and compressed through the brake line and pushes the pistons/brakepads against the brake disc. However if your brake fluid contains air then it is that which is compressed first and hence you can’t brake as well.
I thought that bleeding my brakes (Hayes 9’s and Shimano) was going to be an absolute nightmare. As it turned out it was pretty straight forward.
Before you start gather the materials you will need –
Rags/old clothes
Brake fluid suitable for your system
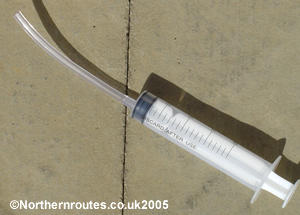
20mm syringe (go chat to your local vet)
short length of piping from the DIY store
Brake cleaner
Spanner suitable for looseding the bleed nipple on your caliper
Safety –
Don’t get brake fluid in your eyes, it smarts a little. It’s also best to wear a pair of latex gloves and avoid contact with the skin altogether.
Also avoid spilling fluid on your frame or fork, especially DOT fluid as it can remove the paint. If you do get some on the frame or folk give it a good soaking with some brake cleaning spray.
It’s advisable to remove the wheels and brakepads from the bike so that they do not get contaminated. If you’re a bit of a risk taker you may wish just to cover the caliper. When I do this I use a plastic freezer bag and pierce a small hole in it that is just big enough to get the bleed nipple trhough. I place it on the bleed nipple and then turn the bag inside out thus protecting the caliper, pads and disc.
Wrap plenty of rags around the lever and handle bars to catch the brake fluid. Clothes pegs are ideal for keeping the rags in place. Leave enough room open so that youcan see the hole in the reservoir.
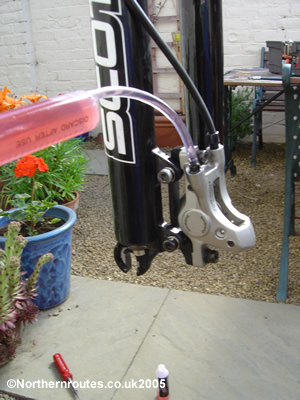
Insert the hose onto the syringe. Its a good idea just to warm the end of the hose in hot water before you push it on. Do the same with the other end of the pipe and stick it over the bleed nipple on the caliper as it cools. When cool remove it from the bleed nipple.
Now take the syringe and place the hose in the new and sealed bottle of brake fluid. Pull the plunger up and draw the syringe full of fluid taking care not to pull the plunger all the way out! Get the tube deep in the fluid and try not to get any air in it.
Get rid of any excess air in the tube by pushing on the plunger.
Place the tube on the bleed nipple, have a spanner in place ready to slacken it off. Slighty loosen the nipple and depress the plunger. Keep pushing at a steady rate.
Get a mate to tap the brake line to help dislodge trapped air and watch the reservoir end to let you know when the fluid is running clear.
When sufficient fluid has passed through the system and no more air and dirty fluid are found, close the bleed nipple on the calliper while still pressing down on the plunger.Don’t over tighten! Remove the syringe/tube from the caliper and give it a good drenching with brake cleaner.
Place the reservoir plug back in its hole. Remove the rags carefully and give the lever and surround area agood blast with the brake cleaner.
Leaving your lever in the upright position pull the lever down towards the handlebar grip and tie it off. Leave it at least 12 hours to help get rid of any excess air.
Make sure you test the brakes before you head away from home.
I have also just used the same technique to bleed a set of Shimano brakes (with mineral brake fluid) and it works well.


Leave a Reply