Before I discuss the fitting of such devices in a boat I need to make something perfectly clear – Any device that slows down or restricts your exit from your boat is DANGEROUS, there is a reason why they are termed SUICIDE STRAPS. If you are daft enough to fit a lapstrap, thigh straps or any other system then it is at your own risk. Unsponsored and the kayakers who have submitted images of there systems take NO RESPONSIBILITY for damage caused to boats or lives resulting from the use of such systems. You’ve been warned! If you do decide to install a system please take note of the following guidelines:
Any system MUST be quick release
Any system MUST be quick release
If you’re getting munched in a hole you must be able to get out
Any system MUST be quick release
You get the message!
Fitting a strap system
For this job you will be dealing with the seat of your boat. There is no need to drill or tamper with the boat shell. This could easily mean leaks, or permanent damage!
I had seen a number of different systems in a few other boats, but opted to use the snowboard binding option as it seemed the easiest to release.
The following shots show a Prijon Delirium being fitted with a set of Burton snowboard ankle bindings. The following bits of kit were needed to complete the job;
> Boat
> Bindings
> 8 stainless steel bolts
> Quick release buckle
> 6mm cord
> Drill & Drill bits
> Sharp Knife/Scissors
> Allen key (Depending on boat fittings)
> Philips screwdriver
> Cigarette Lighter
> Webbing/tape
Bindings can be sourced from all decent snowboard shops. They often have a box of spares kicking around and if you don’t mind the colour schemes they sometimes have you can get a pair of ankle straps for under £15.
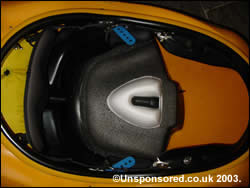
The first task was to loosen the seat on my Delerium [img 1], this was a fairly simple job which involved undoing the two allen key boats on either side of the cockpit. I decided not to remove the seat from the boat because I had all the access I needed. In most other cases it is likely that removal of the seat is necessary, this isn’t a really difficult job but can be time consuming.
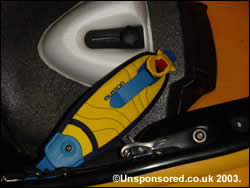
The seat post in Prijon boats already have a number of holes to reposition the seat in the boat and two additional holes which have no apparent purpose [img 2]. I elected to use one of these two holes (to save drilling the seat!). If your seat posts don’t have any holes then it is drill time. Measure twice and drill once!
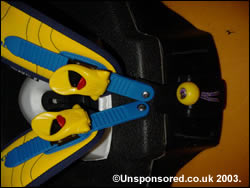
One end of the binding (the none ratchet end) was quickly bolted into position using a stainless steel bolt, washer and locking nut. This was repeated for the other side of the seat. As far I as I was concerned this was the end of the difficult part so I refitted the seat into position. The two blue plastic strips can be clearly seen sticking out from under the cockpit edge [img 3].
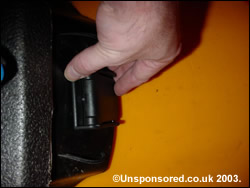
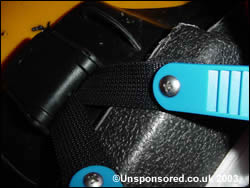
The padded section of the binding strap was then added using a nut and bolt [img 4]. Although it probably would not come in contact with me or my kit I made sure at this point that the bolt was short enough so that it would damage my paddle shorts etc.
I also had a sit in the boat to judge if at this point the system was OK whether or not the attachment points needed to be adjusted. And to see how long the webbing that was to be attached to the other end of the binding needed to be.
The webbing was cut to length (around 20 – 25cm’s long in this case) and one end doubled over (to strengthen it) and a holes cut to take the bolts. The holes were then sealed with a lighter to prevent tears. This was then bolted onto the ratchet end of the binding with a locking nut and washing in place.
The quick release buckle was next, get this wrong and you won’t be getting out of your boat!
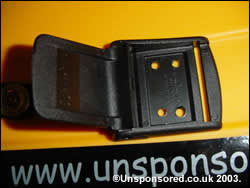
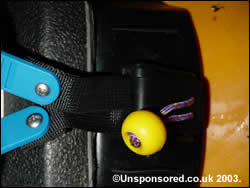
The type used was the same as found on the chest harness of PFD’s, it was pretty hard to come by, but a quick ring round a few diving shops sorted that out. I drilled the base section ready for it to be bolted to the seat [img 5]. An additional two holes were also drilled on the flap for a quick release handle to be added.
The buckle was then held in position [img 6] marks were made ready for the seat to be drilled. Once the seat was drilled the buckle was then bolted in place using the same stainless bolts, washers and locking nuts as used before.
A quick release pull was made using the 6mm cord and a rope stop from the local chandlers. This was looped through the release flap and fastened securely with a decent knot.
Images 7 shows the tape, buckle and quick release strap in place. In total only four holes have been drilled in the seat simply to hold the buckle in position.
When using the completed system the tape at the end of the ratchet strap is place in the buckle and the buckle locked down. The ratchets are then used to get a snug comfortable fit.
The next time a paddled I found a nice still piece of water, fastened the straps up and performed a capsize drill. Its important that you make sure that the system does work fully. I had a fellow paddler on standby incase the system failed.
Over all the fitting of the lapstrap was a pretty simple process with only the replacement of the seat the time consuming part.





Your site is actually very informative. Many thanks for that.