From the very first moment you sit in a boat you start to get “a feel for it”, how it fits and possibly even how it may perform. As beginners we start off in boats that may be used by many different size paddlers, which results in cockpits being kept clutter free. Loose, comfortable boats feel good on flat water, but they can make leaning and bracing difficult. Once the boat is padded to provide a close, body-hugging fit that still allows for quick and easy water exits, performance can dramatically improve. This same rule applies to all levels of kayakers, whether they’re paddling easy whitewater, big water runs or creeks. Customised outfitting helps transfer every trace in the river’s current through the kayak’s hull to your body, helping you sense your surroundings, make critical maneuvers and maintain your balance, thus staying upright!

Since paddlers press against their boat’s inner hull with the small of their backs, butts, hips, thighs, knees and feet, it is these key areas that should be customised to match the shape and size of the paddler. To make this as easy as possible I am going to break the cockpit into a handful of sections and tailor each one to help you get the best control possible from your boat.
Tools and Parts:
Before you get to work, take a look at a few customised kayaks and talk to your local canoe retail expert. Seasoned experts can customise a whole boat with one block of minicell foam, some carving tools and glue. Many shops, however, carry pre-cut pads, making the job easier. A sharp knife, some dragonskin (a special foam-shaping tool) and some waterproof contact adhesive like Evostik is all that is needed to make pads for your cockpit. If not already fitted to your kayak items such as back bands may require drilling. Again, your local shop can provide advice on outfitting…and then sell you what you need to do it on your own.
Mini Cell Foam:
Mini Cell foam is the dense foam that is used for pillars in kayaks. It can be bought in various sizes but is very expensive from canoe/kayak stores. Car audio shops are a good source of mini cell foam as it is used extensively as sound deadening within cars.
Back Bands/Back Rests:
Back bands and lumbar pads nestle against the small of your back, preventing you from sliding backward off your seat and holding you forward against your foot braces. They even provide some welcome lumbar support, easing the strain kayaking imparts on your lower back. These attributes more than outweigh the marginal increase in risk of becoming trapped that accompanies the installation of a back band. After-market back bands are designed to thread through holes in the seat and foam wall or bolt onto the seat itself for a solid connection. Many of the new ww kayaks come with very similar backbands that are fairly effective and may mean that adaptation or replacement will not be necessary. The greater occurrence of ratchet backbands may also make this impossible. However I will say that from personal experience that getting a decent backband in your boat can make a world of difference.

Hip pads:
Without a good set of well fitting hip pads you may find any advancement in your paddling skills impossible. Basically if your seat is wide enough to slide a hand between your hips and the seat walls, you’ll probably need to add hip pads to customise your boat’s fit.

Hip pads help you tilt and lean your kayak when you’re right side up, and help you stay inboard and roll when you’re upside down. Provided you don’t make the shims too tight, your boat will comfortably grab your hips and your level of control will skyrocket without your leg going to sleep minutes after entering the boat. Remember that when you pad up your seat that you will be wearing your paddling kit when you use them on the water. Will you still fit; will they be too tight or not tight enough?

Seat pads:
The plastic seat most manufacturers install in their kayaks is molded to fit a generic butt. My butt isn’t generic, and yours probably isn’t either, but fortunately, you can modify it – but liposuction is quite expensive! So you’re probably better off modifying the seat. Thin foam (like sleeping mats) or rubber seat pads are remarkable leg savers. They help prevent leg numbness by spreading your weight over broader parts of your butt, while simultaneously increasing the friction between your butt and seat. Remember that “thin” is an important word when selecting seat pads. Thick seat pads raise your centre of gravity and make it harder to balance in your boat and ultimately harder to roll, although cartwheels etc may become easier to initiate. Many manufacturers are now providing seat pads or even foam seats in their new ww kayaks.
Pleasure Pods:
Well what can I say! Where the pleasure comes from I do not know but basically this is a bit of padding that sits on the front of the seat in between your legs. It provides more contact between the boat and your inner thighs giving the seat a “saddle” feel. Both Perception and Prijon fit these as standard to their ww craft and they allow some adjustment through the bolt that fastens the pod to the seat. A pod can be easily crafted from layers of sleeping mat or from minicell foam.
Thigh braces:
Only a few years ago kayaks came with standard thigh braces that offered little in the way of adjustment. Nowadays the situation is improving with most manufactures offering adjustable, interchangeable or even flexible thigh braces. Correct adjustment/fit is crucial. Spend plenty of time sitting in your boat and trying the thigh braces out. If you can adjust the position until the fit is right. But remember you must be able to get out of the boat in an emergency!
Thigh pads:
Every time you lean or roll, one of your thighs tends to sneak toward the center of the cockpit. Left to its own devices, it would slip free from its thigh brace and cause you more control problems than you would ever want to contemplate. Foam or neoprene thigh pads not only cushion and comfort your connection with your thigh braces; they provide the friction necessary to keep a solid grip on your boat. If your thigh pads don’t fit you quite right, you can increase or decrease the amount of foam around your thighs until your legs melt perfectly into your cockpit.
You can even build foam hooks along the inside of your knees if your thigh braces lack these features, or shave cups for your kneecaps to give you the ultimate in fit and control.
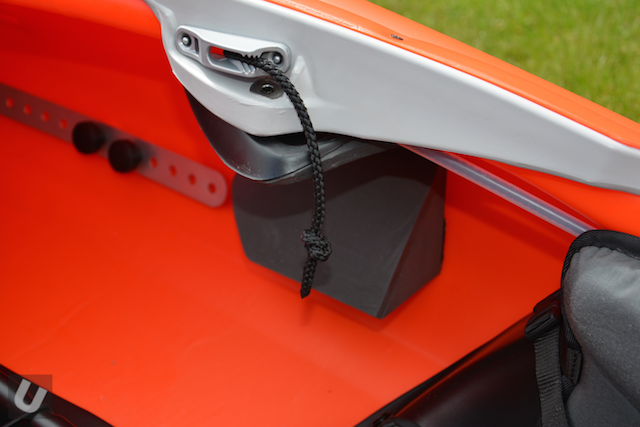
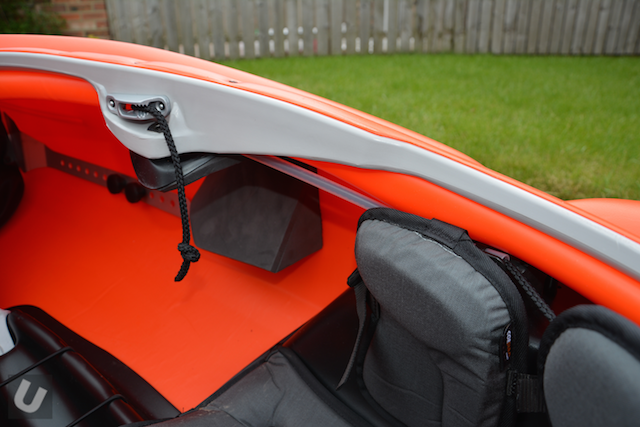
Footbraces and bulkheads:
This is the final point of contact with your kayak. Footbraces and bulkheads provide solid footing and help you push the rest of your lower body tightly into position. When perfectly adjusted, your feet will rest comfortably against the footbraces. But once you apply a little pressure, your thighs, hips, butt and back press slightly harder against their respective pads providing the necessary whitewater fit. You basically have two options – metal/plastic footrests that are bolted into the boat or foam bulkheads that are trimmed to meet you needs. Both have there pro’s and con’s and is really down to a question of “feel”. Foam may be the best option since no drilling is needed and if you get it wrong you just pull it out.
The newest development in footrest technology (if you can call it that) is the bean bag system. Essentially a small airbag partially filled with polystyrene beans is placed into the boat as a footrest. As your feet push out the air the bean become locked together forming a solid footrest. A simple idea that works really well.
Glue:
Contact adhesive like Evostik is best. The full fat version with the nasty solvents also does a better job. To really make this stuff stick apply a thin coat of glue to both surfaces and allow to dry fully 30 mins is more than enough time. Then apply another thin layer to both surfaces, allow this layer to go tacky (approx 15 mins) and stick both parts together. This double glue method provides a much stronger bond and will keep pads within the boat in place for years.
Leaks:
Having a small amount water entering your boat does not create too many problems. However if the water builds up it can make the boat unstable.
Inevitably water will get in via the contact area between the spray skirt (deck) and you or cockpit. Using a skirt that fits both you and the boat well will minimise this.
Any other hole in the boat can be place where water may enter. These tend to be the drain bung and the screws used to hold you seat/thigh braces in place.
On buying a new boat and getting it setup I like to back off all of the screws/bolt in the cockpit area. I then squirt a little clear silicone sealer behind the screw/bolt head and then fasten everything back up.
From experience I have found that the drain bung has been a problem area for leaking. This can be tested by putting some water in the boat and standing it on end with the bung in place. If water escapes you know that there is an issue that needs to be addressed. Usually its the area where the drain bung unit mounts to the kayak that is at fault. Wiping some silicone around the inside of the boat/bung takes care of this.
Leave a Reply